- 1. 概要
- 2. インストール
- 3. SDDM カスタマイズ
- 4. ユーザ用初期化ファイルの作成
- 5. ログインマネージャ起動
1. 概要

 下記のデスクトップ環境を構築する手順を記述します。
| 項 目 | 内 容 | 備考 |
|---|
| ホスト | Windows11 Version 24H2 | |
| VitualBox | Version 7.1.6 | |
| 仮想タイプ | BSD | |
| 仮想サブタイプ | FreeBSD | |
| 仮想バージョン | FreeBSD(64bit) | |
| ゲスト | FreeBSD 13.5 RELEASE | |
| ログインマネージャ | SDDM | |
| ハードディスク | 180 GB | |
| メモリ | 4 GB | |
| CPU | 2コア | |
| グラフィックスコントローラ | VBoxSVGA 128MB 3D Disable | |
 ここまでの時点で、システムインストールと「VirtualBox Guest Additions」の設定は終わっているものとします。
 それぞれのインストール・設定に関しては、

	「FreeBSD - デスクトップ環境構築 - 共通事項 - システムインストール」
	「FreeBSD - デスクトップ環境構築 - 共通事項 - VirtualBox Guest Additions」

 をご参照ください。

2. インストール

 「root」ユーザで


pkg install -y xorg numlockx ja-font-migmix
pkg install -y sddm sddm-freebsd-black-theme cursor-neutral-white-theme


pkg install -y awesome


 バージョンの推移です。

	・2020年 6月26日「FreeBSD 11.4 RELEASE」「awesome-4.3_1,1」
	・2020年11月11日「FreeBSD 12.2 RELEASE」「awesome-4.3_1,1」
	・2021年 6月18日「FreeBSD 13.0 RELEASE」「awesome-4.3_1,1」
	・2021年12月22日「FreeBSD 12.3 RELEASE」「awesome-4.3_1,1」
	・2022年12月15日「FreeBSD 12.4 RELEASE」「awesome-4.3_3,1」
	・2023年 4月27日「FreeBSD 13.2 RELEASE」「awesome-4.3_3,1」
	・2024年 1月 9日「FreeBSD 14.0 RELEASE」「awesome-4.3_4,1」
	・2024年 3月12日「FreeBSD 13.3 RELEASE」「awesome-4.3_4,1」
	・2024年 6月10日「FreeBSD 14.1 RELEASE」「awesome-4.3_5,1」
	・2024年10月 3日「FreeBSD 13.4 RELEASE」「awesome-4.3_5,1」
	・2024年12月12日「FreeBSD 14.2 RELEASE」「awesome-4.3_5,1」

 2025年3月24日「FreeBSD 13.5 RELEASE」へのインストール時は、「awesome」のバージョンは、下記のとおりです。


$ pkg info awesome
awesome-4.3_5,1
Name           : awesome
Version        : 4.3_5,1
Installed on   : Mon Mar 24 14:48:02 2025 JST
Origin         : x11-wm/awesome
Architecture   : FreeBSD:13:amd64
Prefix         : /usr/local
Categories     : x11-wm
Licenses       : GPLv2+
Maintainer     : ports@FreeBSD.org
WWW            : https://awesomewm.org/
Comment        : Highly configurable, next generation framework window manager
Options        :
        DBUS           : on
        DOCS           : on
        MANPAGES       : on
Shared Libs required:
        libxkbcommon.so.0
        libxkbcommon-x11.so.0
        libxdg-basedir.so.1
        libxcb.so.1
        libxcb-xtest.so.0
        libxcb-xrm.so.0
        libxcb-xkb.so.1
        libxcb-xinerama.so.0
        libxcb-util.so.1
        libxcb-shape.so.0
        libxcb-render.so.0
        libxcb-randr.so.0
        libxcb-keysyms.so.1
        libxcb-icccm.so.4
        libxcb-cursor.so.0
        libstartup-notification-1.so.0
        liblua-5.3.so
        libintl.so.8
        libgobject-2.0.so.0
        libglib-2.0.so.0
        libgdk_pixbuf-2.0.so.0
        libdbus-1.so.3
        libcairo.so.2
        libX11.so.6
Annotations    :
        FreeBSD_version: 1304000
        build_timestamp: 2025-03-01T17:45:06+0000
        built_by       : poudriere-git-3.4.2
        port_checkout_unclean: no
        port_git_hash  : dddb9bab3
        ports_top_checkout_unclean: no
        ports_top_git_hash: e0f6c38f9
        repo_type      : binary
        repository     : FreeBSD
Flat size      : 2.20MiB
Description    :
awesome is a highly configurable, next generation framework window
manager for X. It is very fast, small, dynamic, heavily extensible using
the Lua programming language, and licensed under the GNU GPLv2 license.

It is primarly targeted at power users, developers and any people
dealing with every day computing tasks and who want to have fine-grained
control on theirs graphical environment.


3. SDDM カスタマイズ

 ログイン画面の解像度を「1366x768」とし、キーボードレイアウトを「jp.106」にします。
 「root」ユーザ権限で。


cat << EOF >>  /usr/local/share/sddm/scripts/Xsetup

xrandr --output VGA-0 --mode 1366x768 --rate 60
setxkbmap -layout jp
EOF


 ログイン画面のテーマとカーソルを変更します。
 「root」ユーザ権限で。


sddm --example-config > /usr/local/etc/sddm.conf
vi /usr/local/etc/sddm.conf


[Theme]
# Current theme name
Current=breeze

# Cursor size used in the greeter
CursorSize=

# Cursor theme used in the greeter
CursorTheme=breeze_cursors


 を下記へ変更します。


[Theme]
# Current theme name
Current=sddm-freebsd-black-theme

# Cursor size used in the greeter
CursorSize=

# Cursor theme used in the greeter
CursorTheme=Neutral++_White


4. ユーザ用初期化ファイルの作成

 「root」ユーザ権限で。
 日本語環境を有効にし、キーボードレイアウトを設定して、Num Lock を有効にします。


sh
cat << 'EOF' >> /etc/profile

export LC_ALL=ja_JP.UTF-8
export LANGUAGE=ja_JP.UTF-8
export LANG=ja_JP.UTF-8
EOF

cat << 'EOF' >> /etc/csh.cshrc

setenv LANG             ja_JP.UTF-8
setenv LANGUAGE         ja_JP.UTF-8
setenv LANG             ja_JP.UTF-8
EOF

cat - << EOF >> /usr/share/skel/dot.xsession
#!/bin/sh

setxkbmap -layout jp
numlockx &
EOF
exit

chmod +x /usr/share/skel/dot.xsession


 既存のログインユーザで


cp /usr/share/skel/dot.xsession ~/.xsession


5. ログインマネージャ起動

 前項までインストール・設定したものを有効にします。
 「root」ユーザ権限で。


sysrc dbus_enable=YES
sysrc sddm_enable=YES


 起動。


service dbus start
service sddm start


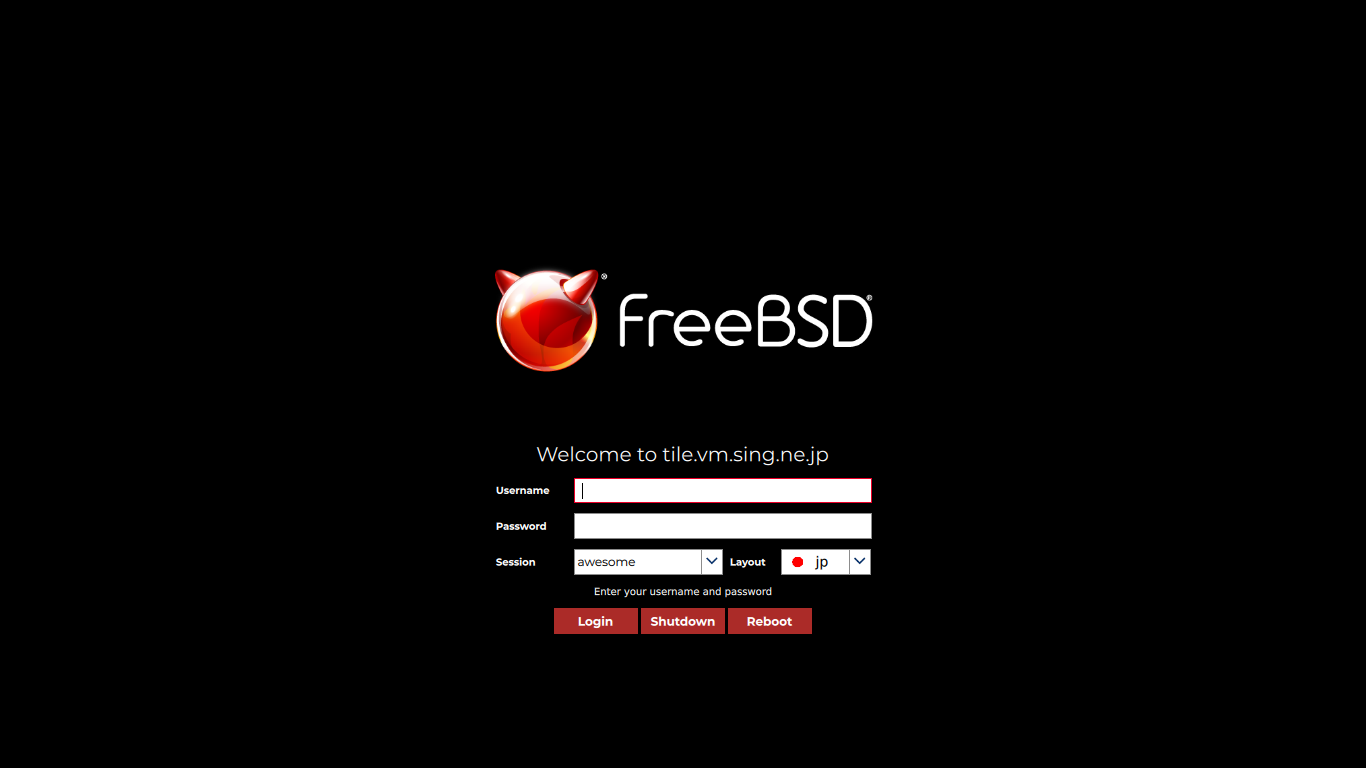
 うまく設定できていれば、ログイン画面が表示されます。
 ユーザ名・パスワードを入力してログインします。

|